
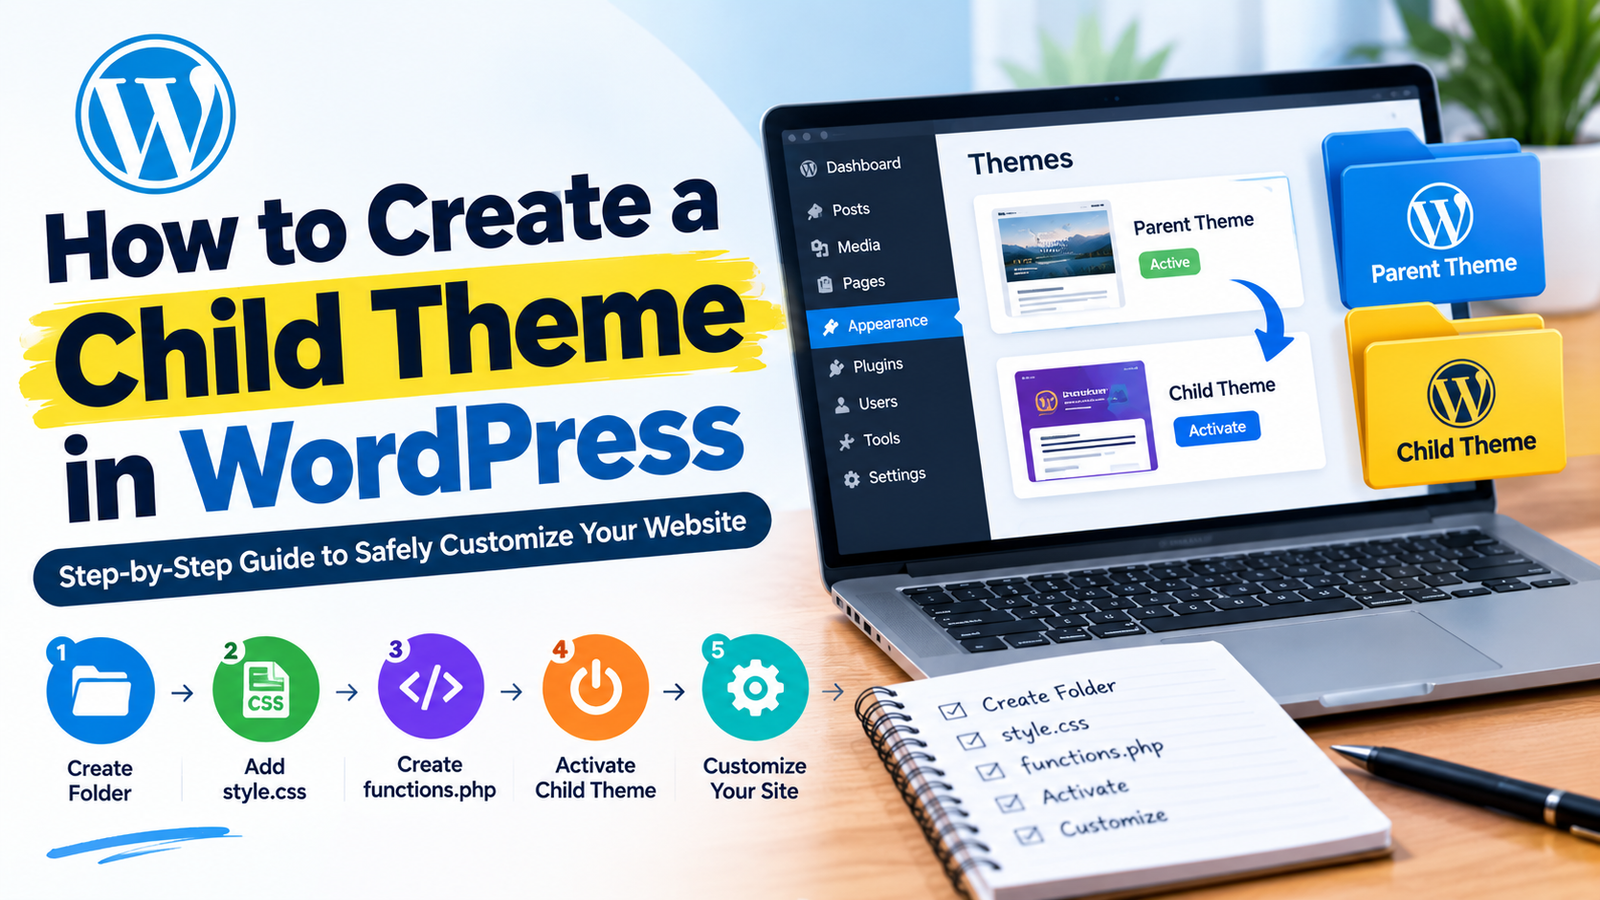
A WordPress child theme allows you to customize your website without directly changing the files of the original parent theme. This is useful when you want to modify your theme’s design, functions, or layout while keeping your customizations safe when the parent theme receives updates.
If you want to make advanced changes to your WordPress website, learning how to create a child theme in WordPress can help you manage those changes more safely. In this guide, you will learn what a child theme is and how to create one step by step.
What Is a WordPress Child Theme?
A child theme is a separate theme that inherits the features, design, and functionality of another theme called the parent theme.
The child theme can contain your custom CSS, PHP functions, templates, and other modifications. When the parent theme is updated, your custom changes in the child theme normally remain intact.
For example, if your website uses a popular WordPress theme and you want to customize its files, making those changes directly to the parent theme can be risky. A child theme provides a safer way to make customizations.
Why Should You Use a Child Theme?
Using a child theme has several advantages. The biggest benefit is that your customizations are separated from the original theme files.
Here are some important benefits:
- Your custom code can remain after parent theme updates.
- You can safely customize theme styles.
- You can add custom PHP functions.
- You can modify selected template files.
- You can test design changes more easily.
- You reduce the risk of losing customizations during updates.
A child theme is especially useful for developers and website owners who regularly customize their WordPress websites.
Step 1: Create a Child Theme Folder
First, you need to create a folder for your child theme.
Connect to your website using your hosting File Manager or an FTP client. Then navigate to:
wp-content/themes/
Inside this folder, create a new folder for your child theme.
For example, if your parent theme is called “Example Theme,” you could name the child theme folder:
example-theme-child
Use a simple name without unnecessary spaces or special characters.
Step 2: Create a style.css File
Inside your new child theme folder, create a file named:
style.css
Add a theme header to the file. It should contain information about your child theme and identify the parent theme.
For example:
/*
Theme Name: Example Theme Child
Template: example-theme
Version: 1.0
*/
The most important line is Template. Its value must match the folder name of the parent theme exactly.
After the header, you can add your own custom CSS rules.
Step 3: Create the functions.php File
Next, create another file inside the child theme folder called:
functions.php
This file allows you to add custom PHP functionality to your child theme.
Instead of copying the entire parent theme functions file, add only the custom functions you need. You can also use this file to load the parent theme stylesheet correctly when required by your theme setup.
Always check your code carefully because a PHP error can affect your website.
Step 4: Activate the Child Theme
Once the required files are ready, log in to your WordPress dashboard.
Go to:
Appearance > Themes
You should see your new child theme listed there. Click Activate.
After activation, visit your website and check that everything looks and works correctly.
If your website looks different after activation, check your stylesheet setup and make sure the parent theme name in the Template field is correct.
Step 5: Add Your Customizations
Now you can begin customizing your website through the child theme.
For example, you can add custom CSS to change colors, fonts, spacing, buttons, and other design elements.
You can also copy specific template files from the parent theme into the child theme when you need to customize them. However, only copy the files that actually need modification.
Keeping the child theme clean and organized makes future maintenance easier.
Common Mistakes to Avoid
When creating a child theme, beginners often make a few common mistakes.
One common mistake is entering the wrong parent theme folder name in the Template field. Another is editing the parent theme directly instead of making changes in the child theme.
You should also keep a backup before making major theme changes. If something goes wrong, a backup can help you restore your website quickly.
Avoid adding unnecessary code to the child theme. Only include customizations that your website actually needs.
Final Thoughts
Creating a child theme is one of the safest ways to customize a WordPress website. It allows you to modify styles, templates, and functionality while keeping your changes separate from the parent theme.
The basic process is simple: create a child theme folder, add a style.css file, create functions.php, activate the child theme, and then add your customizations.
Once you understand how to create a child theme in WordPress, you can make theme changes with greater confidence and reduce the risk of losing your custom work after future parent theme updates.
Leave a Reply